Click here for more information about the Client Portal.
Configuring the Client Portal involves defining what data to share and how you want it to look.
NOTE: Client Portal settings for records will only affect new records created after the settings are saved. Existing records will not be affected.
Purchase and register the Client Portal PALS.
Select File > Setup > System Options.
The System Options window appears. Select the Features tab and click the Settings button for Client Portal. The Client Portal Setup window appears with the Options tab selected.
Make your changes on the Options tab and the Customize tab as necessary and click Done to save your changes.
The following describes the settings on each tab.
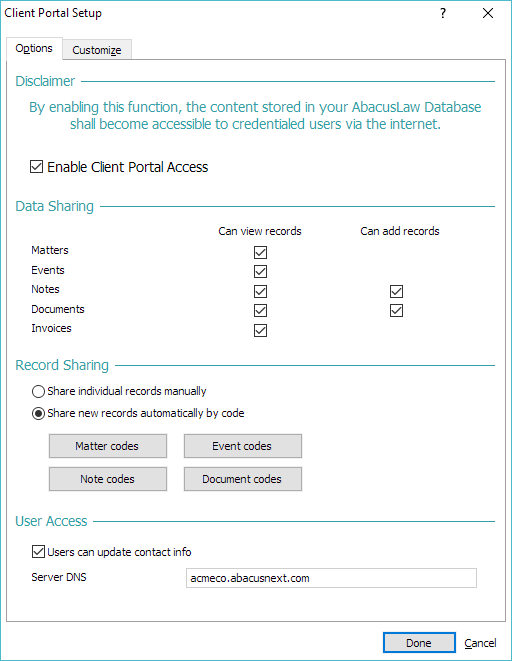
Client Portal Setup - Options Tab
Enable Client Portal Access: Check to enable the Client Portal feature.
Data Sharing:
Select which types of data you want to share with outside people.
Check the Can view records
check box if you want the data to be viewable. If you want clients
to be able to add that type of data, check the Can
add records check box.
Note that Invoices only appears
if Abacus Accounting is enabled. When checked, all unpaid invoices
will be automatically shared.
IMPORTANT:
If you are sharing documents, the document files need to physically
exist. Also, documents must be accessible to the Client Portal, meaning
that they need to be stored in Abacus\Docs. If Enhanced
Document Management is enabled, the documents need to be stored
in the document repository.
Under Record Sharing,
do one of the following:
NOTE: Record Sharing only applies to matters, events, notes, and documents.
If Invoices is checked for
Can view records, then all
unpaid invoices are automatically shared.
If you want to manually select the records that will be shared through the Client Portal, check Share individual records manually.
If you want records to
be viewable through the Client Portal automatically based on code,
check Share new records automatically
by code. NOTE: Sharing records by code only affects new
records - it will not share existing records.
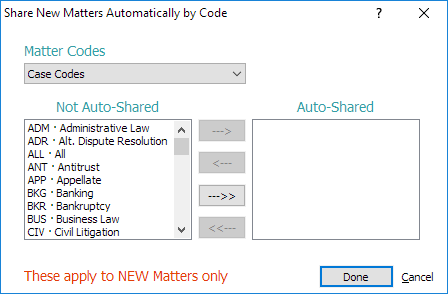
Select the codes for items that will be automatically shared. Click
any of the code buttons under the option. The Share New Matters
Automatically by Code window appears. Records with codes in the
Not Auto-Shared box will
NOT be shared through the Client Portal. Records with codes in
the Auto-Shared box WILL
be shared through the Client Portal. Move a code to a different
box as necessary by highlighting it and clicking the single right
arrow button ( -->
) or the single left arrow button ( <--
). Note that you can click the double arrow buttons (-->>,
<<-- ) to move all
the codes at once. Click Done
to save your changes and close the window.
Under User Access, do the following:
Maximum number of users: Enter the maximum number of users that can access the Client Portal.
Users can update contact info: Check if you want Client Portal users to be able to modify their own contact information.
Server DNS: Enter the host name from the URL to be used to reach the Client Portal. For example, if your URL is https://acmeco.abacusnext.com/invoices, then the Server DNS is acmeco.abacusnext.com.
Client Portal Setup Window - Customize Tab

Logo: Select
your logo image file. The logo appears in the upper left corner of
the Client Portal.
Note that the logo needs to be in PNG format. Consider making the logo
transparent if it has background around the edges. Also, take into
consideration that the logo will be resized as a square 50 x 50 pixels
(or 40 x 40 pixels for mobile layouts).
Color Scheme: Select the color scheme for your firm. NOTE: You may need to clear your Internet browser's cache to see the color scheme change.