On Premise Remote API Service
Click
here for a video demo of this feature.
On Premise Remote API Service allows non-APC (Abacus
Private Cloud) customers to take advantage of the Client Portal as well
as the AbacusLaw Mobile application, provided they are licensed for those
options. The service is a collection of 3 Windows services (AbacusNextDataAccessAPIService,
AbacusNextOAuthService, and AbacusNextOTXClientService) and the web site
AbacusNextRestAPI.
A separate installer was created to install the service.
Pre-Installation Considerations
Customers need to decide whether to install the On Premise
Remote API Service (a) on the AbacusLaw server or (b) on a machine
connected to the AbacusLaw server. This will be a personal preference
for each organization. For example, if the AbacusLaw server is overused,
an organization might need to use a new machine.
Requirements
Share the AbacusLaw install directory so that it
is accessible via the local network.
Install on Windows 10 Pro machine or Windows 2019,
2016, or 2012 R2 server.
If you are not installing on the AbacusLaw server,
ensure that the machine you are installing on is networked to the
AbacusLaw server.
Know the Windows machine name and the IP address
of the server you are installing on.
Ensure that the latest Windows updates have been
installed.
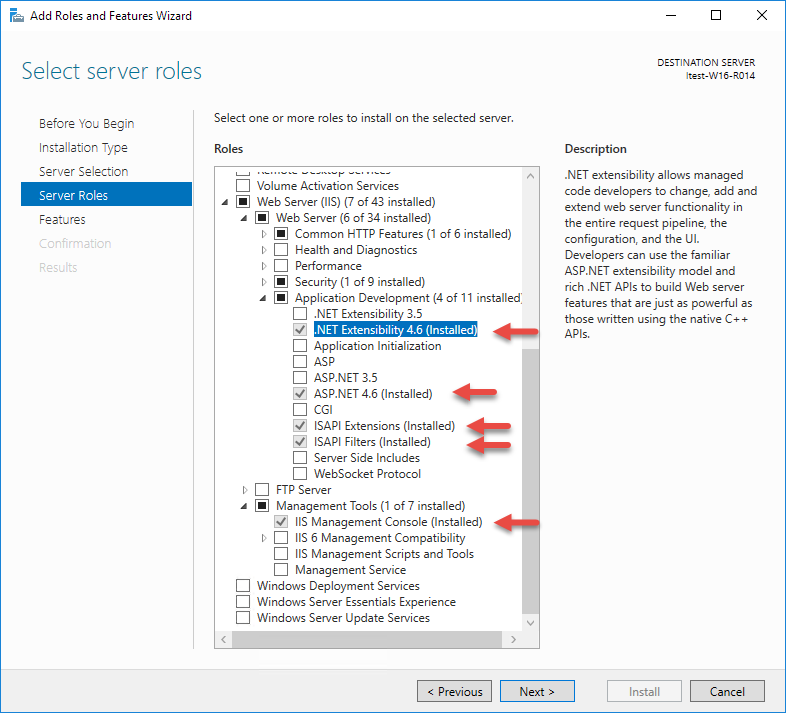
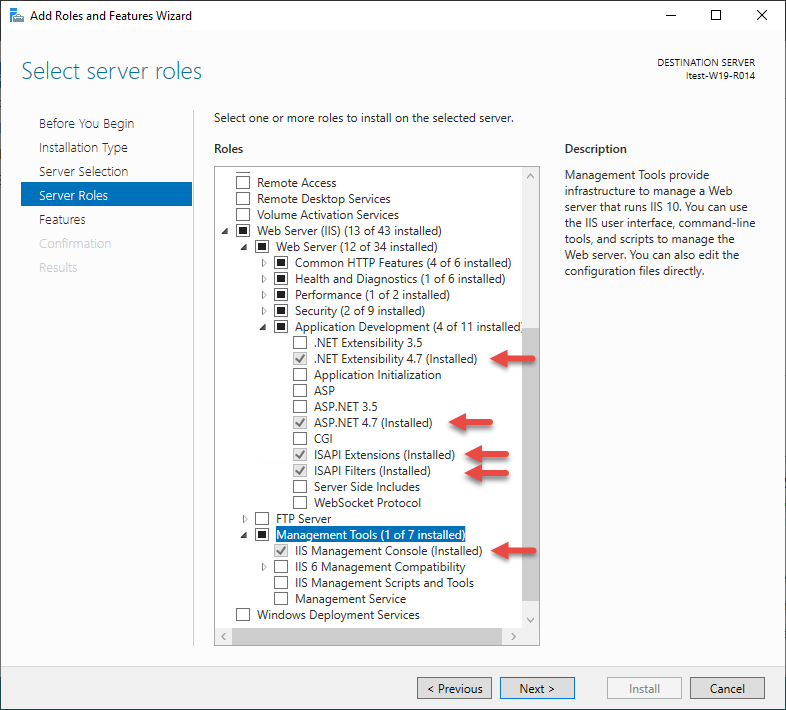
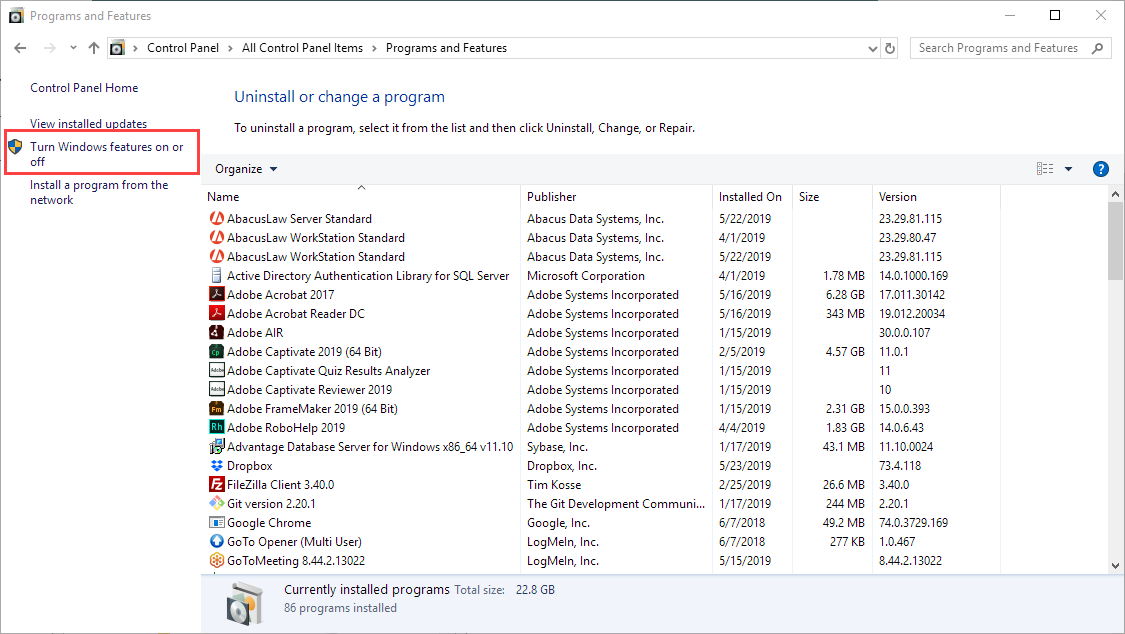
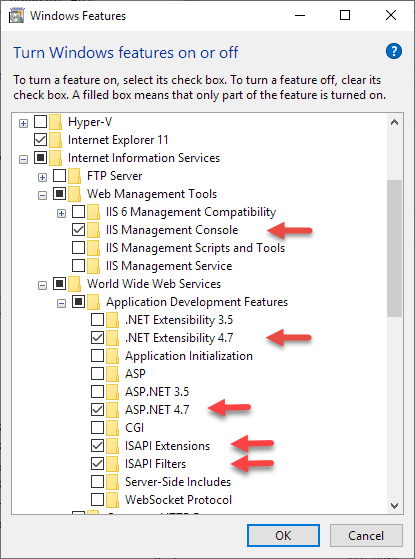
Pre-Installation: Feature Installation Requirements
for IIS and Net Components
For
Windows Server 2016
For
Windows Server 2019
For
Windows 10 Pro
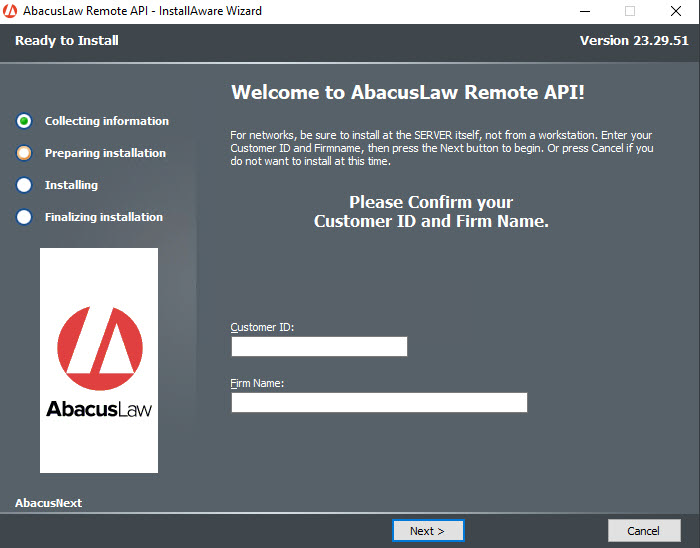
Installing On Premise Remote API Service
Start the installer program. Enter your
customer ID and firm name (if necessary). Click Next.
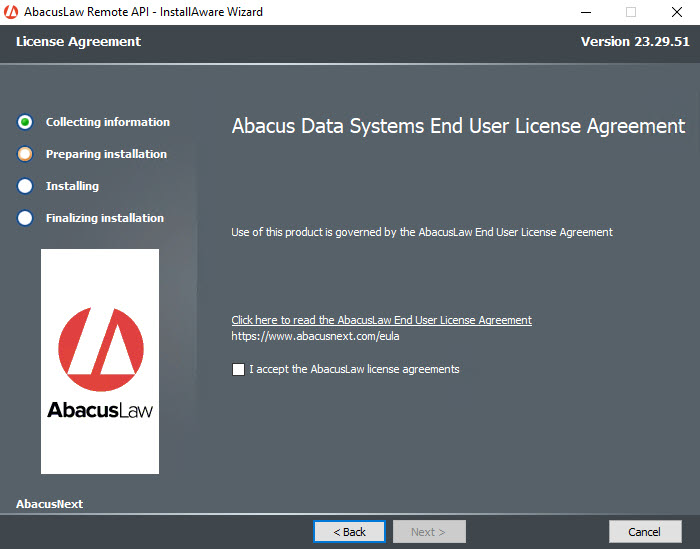
Check to accept the license agreement.
Click Next.
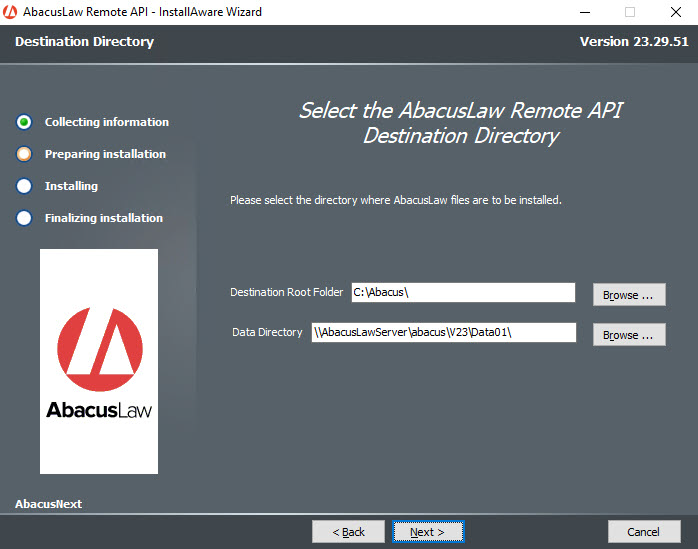
Leave Destination Root Folder
and Data Directory as is. If you change the data
directory, it must be a UNC (not a mapped drive letter).
Note that installed files will be stored in a folder called v23\RemoteAPI
under the destination root folder you choose.
Click Next.
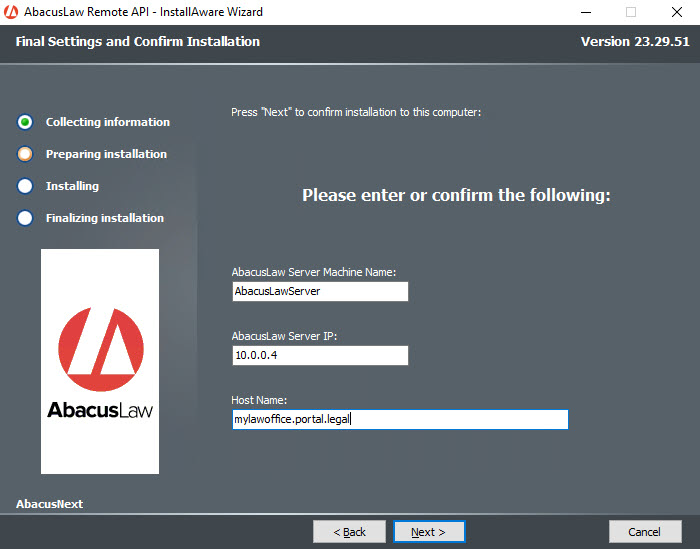
Enter the server machine number and IP
address. If installing on the AbacusLaw server, IP address can be
127.0.0.1. Enter the host name from the URL to be used to reach the
Client Portal. For example, if your Client Portal URL is https://mylawoffice.portal.legal,
then the Host Name is mylawoffice.portal.legal.
Click Next.
A confirmation message appears after
the installation is finished.
If the service was installed on a Windows 2012 R2 server, Windows IIS
(Internet Information Services) and the ASP.NET framework must be
installed manually.
Install IIS on Windows
2012 R2
Install ASP.NET
Framework
Click Finish.

From the Control Panel, open Administrative
Tools. Double-click the IIS Manager to open it.

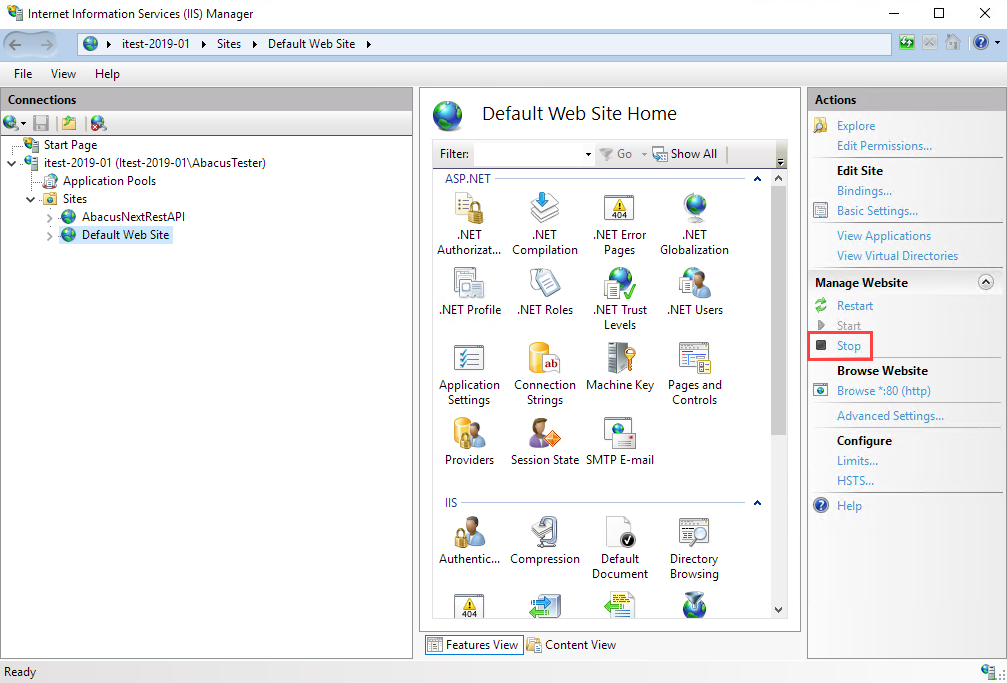
Under Sites, there is
an item called Default Web Site. If you have a web
site listed under Default Web Site then DO
NOT STOP IT. However, if nothing is listed under Default
Web Site, stop it by highlighting Default Web Site
and then clicking Stop in the Manage
Website panel on the right.
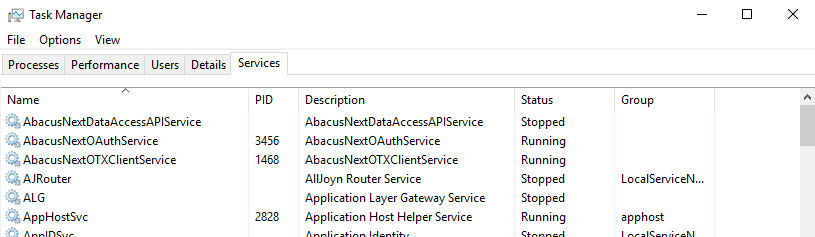
If your database is encrypted, the AbacusNextDataAccessAPIService
needs to be started manually. Open Task Manager (Ctrl+Alt+Del), highlight
AbacusNextDataAccessAPIService, right-click, and click Start.
Post-Installation: IIS Verification Requirements
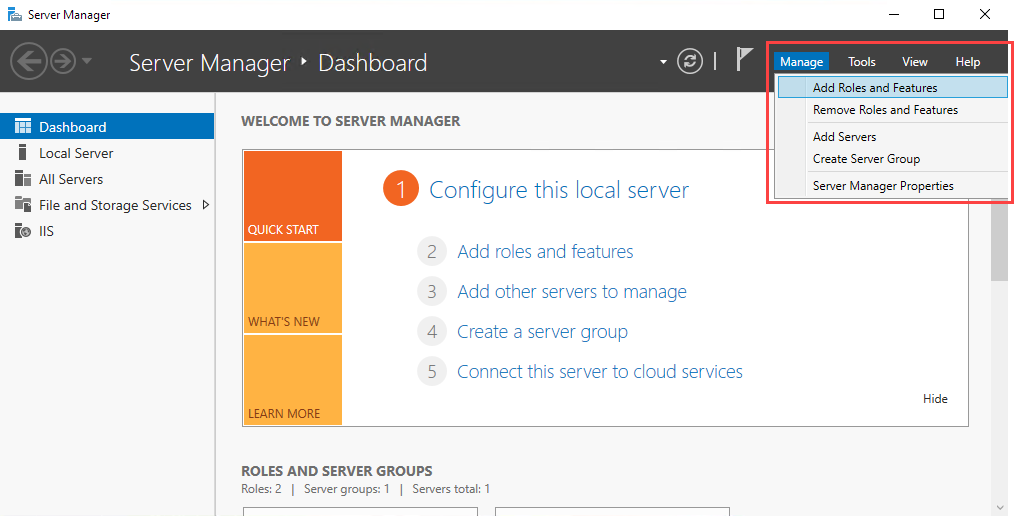
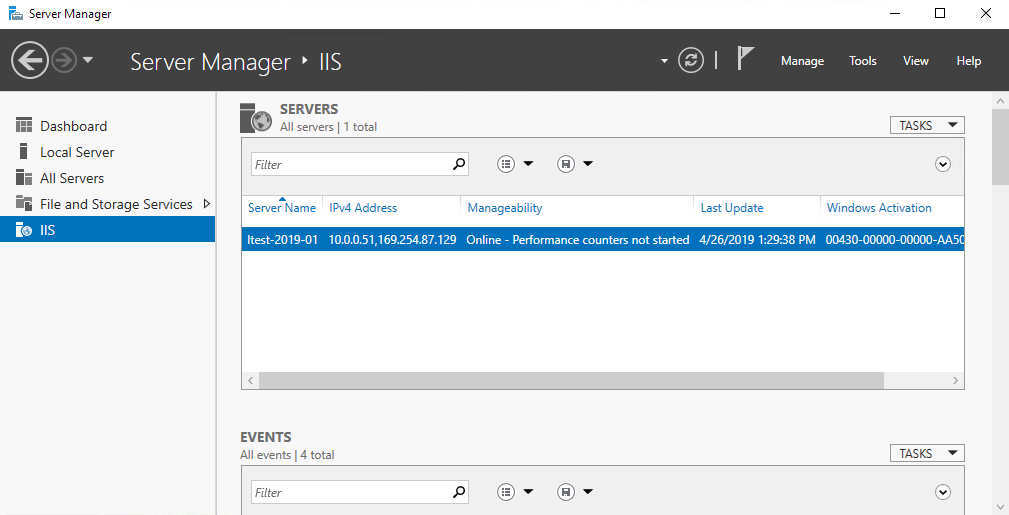
Select the Windows button and enter Server
Manager. Click Server Manager
to open.

Highlight IIS.
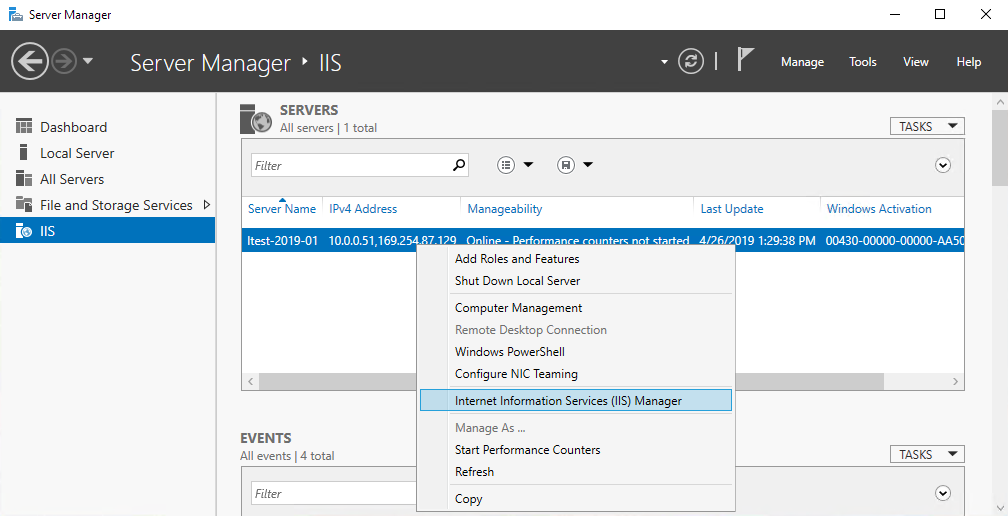
Right-click the server name and click Internet
Information Services (IIS) Manager.
In the Internet Information Services (IIS) Manger,
highlight AbacusNextRestAPI.
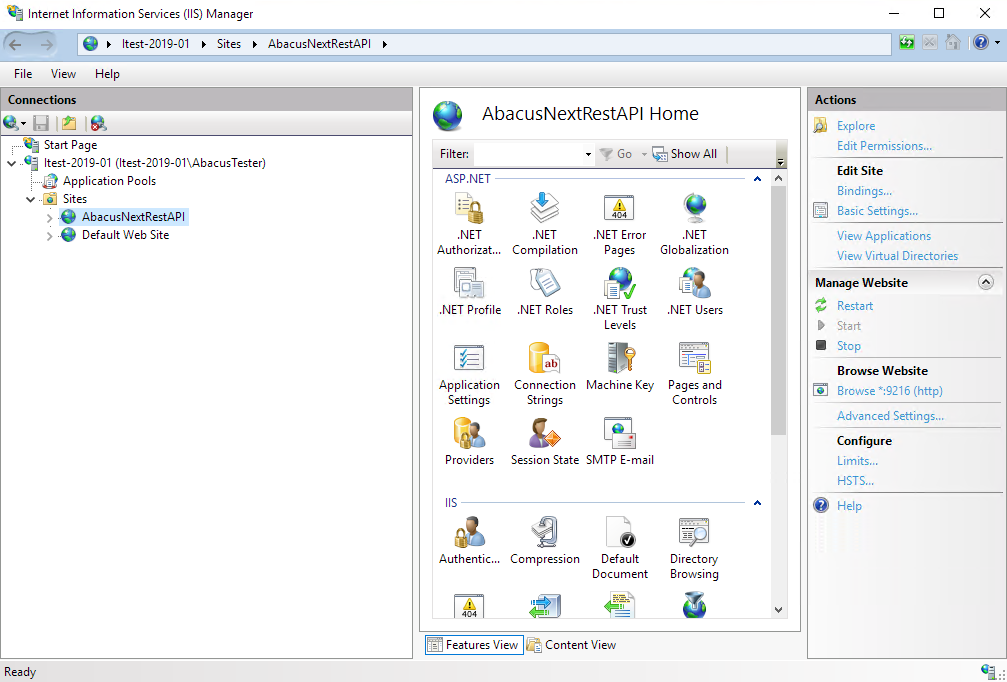
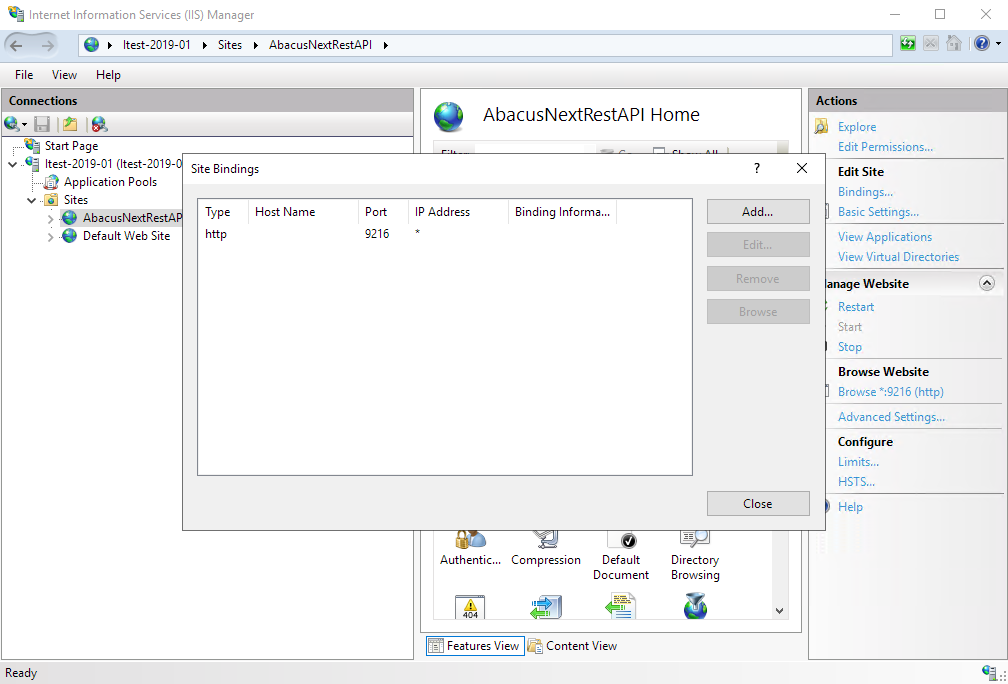
Under Edit Site,
select Bindings.

Ensure that the site bindings look like this:
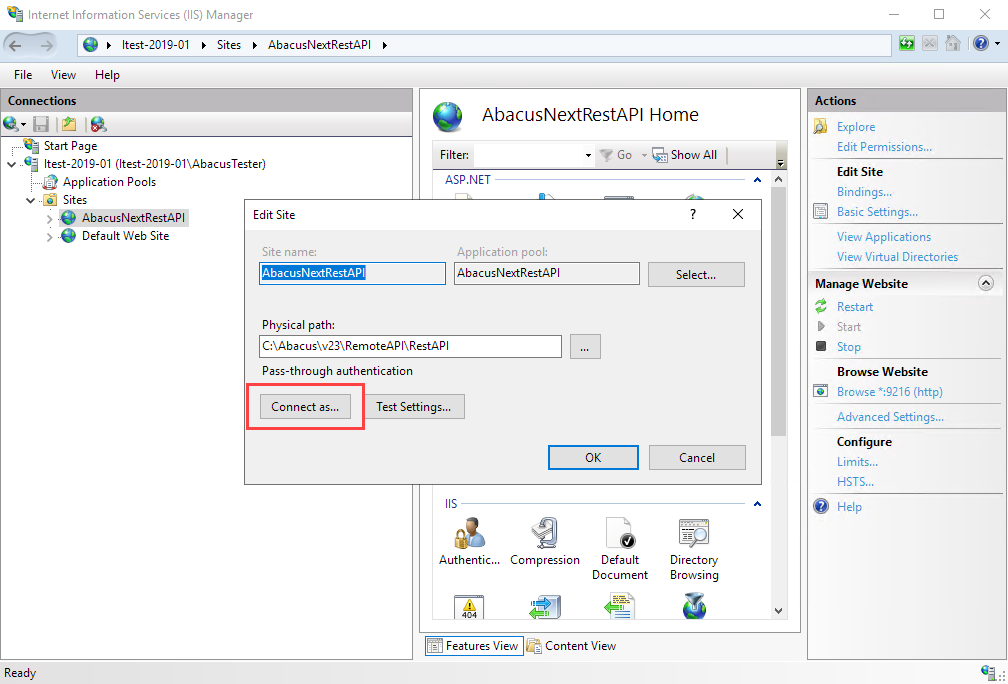
Under Edit Site
select Basic Settings.

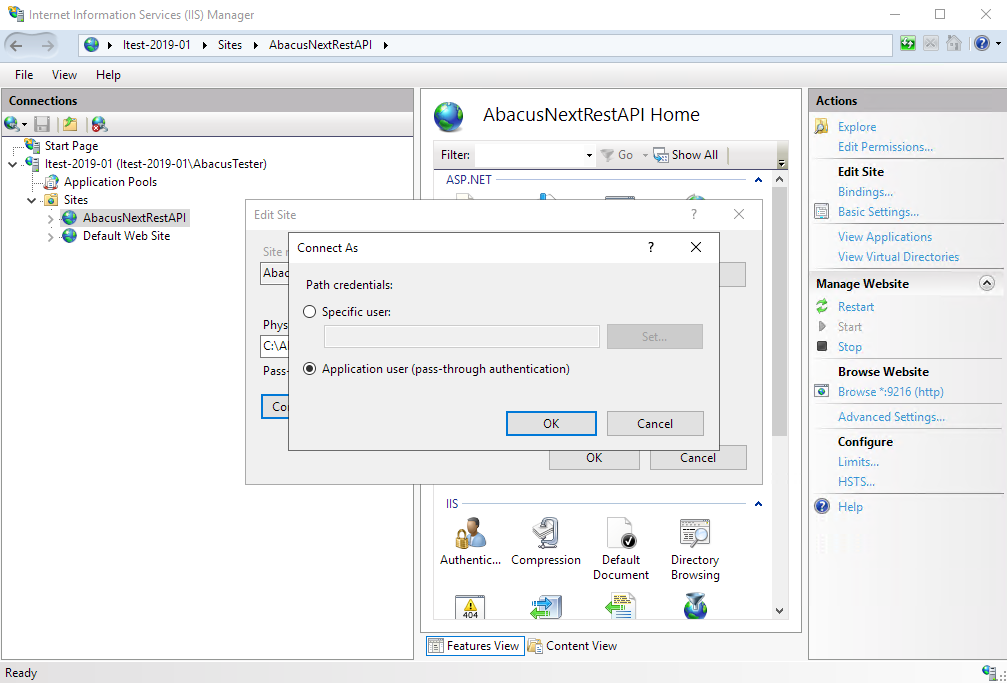
In the Edit Site window, select Connect
as.
Ensure that Application
user is selected.
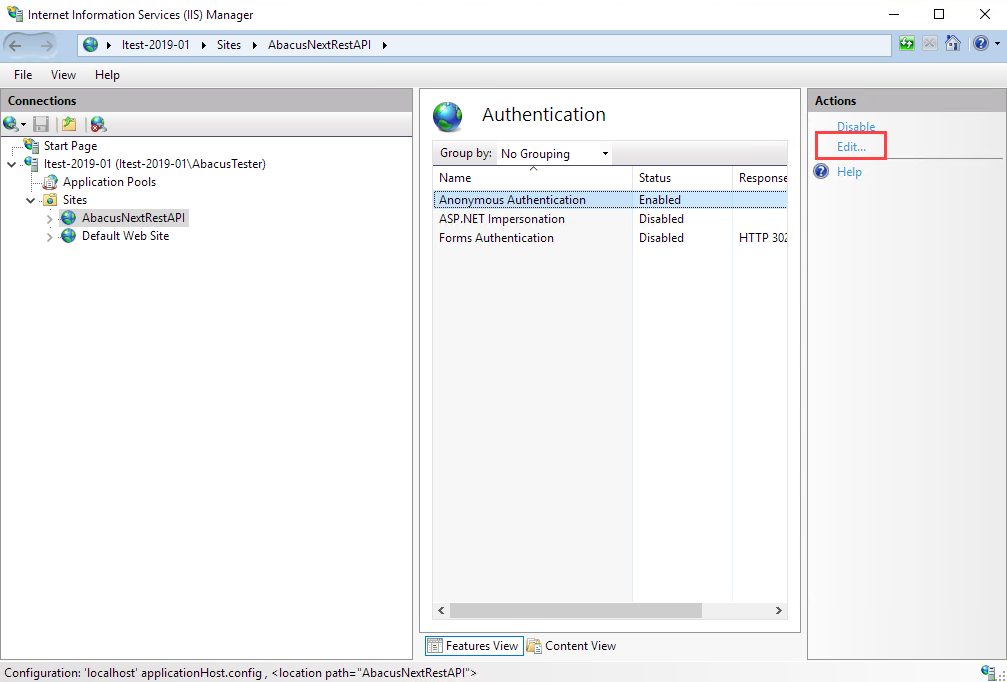
Double-click Authentication.
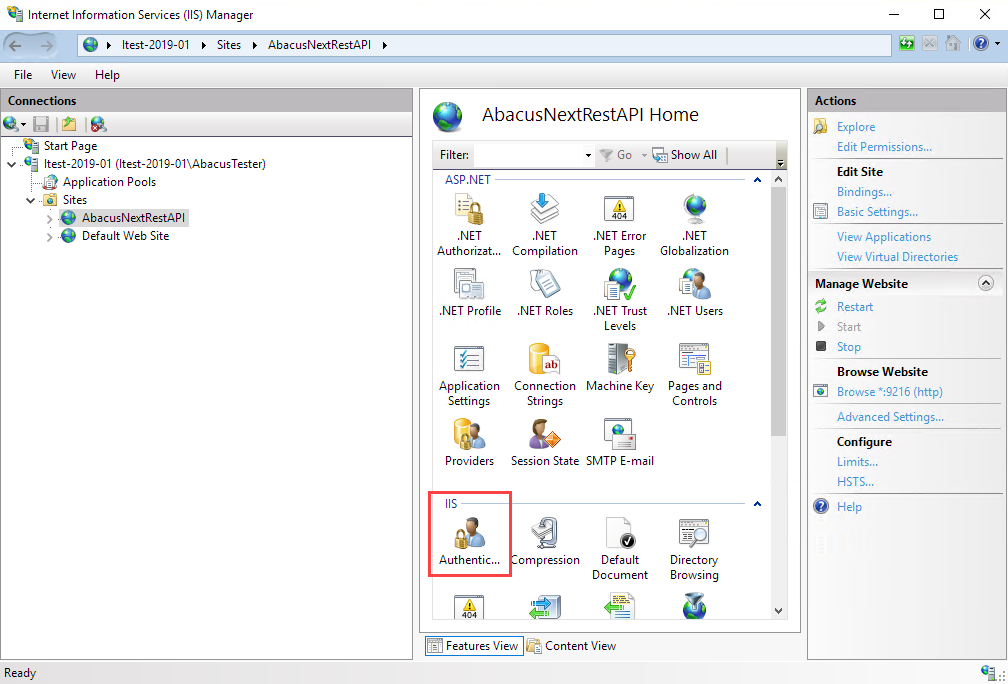
Ensure that Anonymous
Authentication is enabled. (To enable, highlight and click
Actions > Enable.)
Then, highlight Anonymous Authentication
and click Actions > Edit.
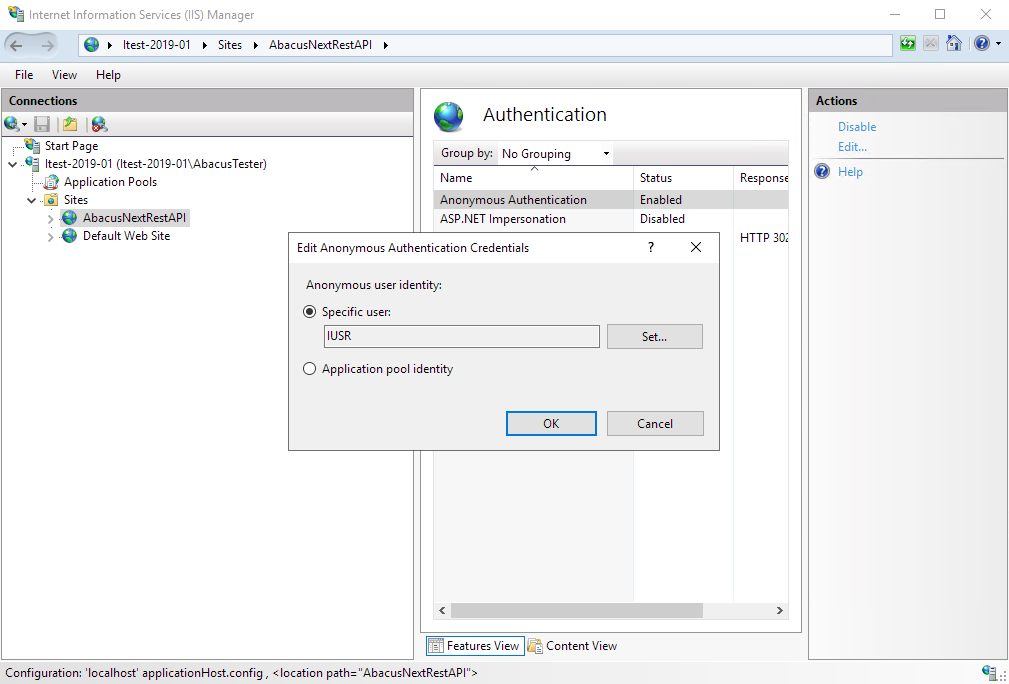
In the Edit Anonymous
Authentication Credentials window, ensure that Specific
user is selected and set to IUSR.
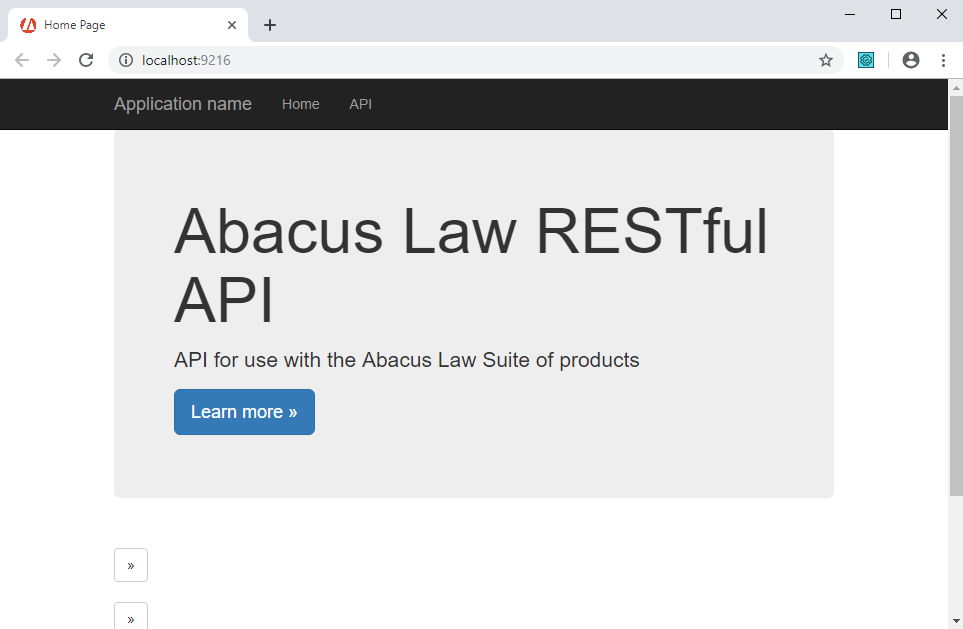
To test your connection, click the link under Browse Website.
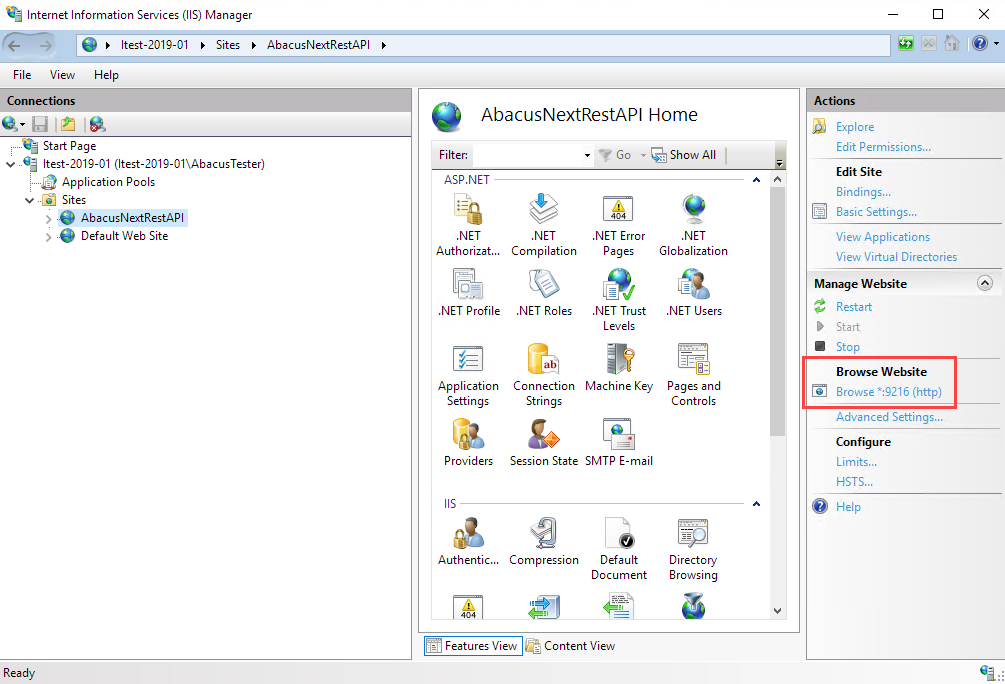
The following confirmation message (which opens in an Internet browser)
indicates that the connection is successful.