Select Billing > Interim Statement.
The Interim Statement window appears.
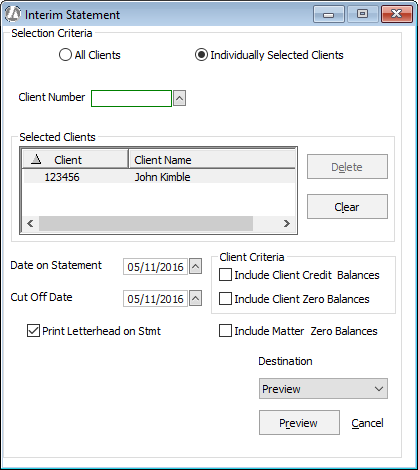
Complete the fields on the window as follows:
All Clients or Individually Selected Clients: Select if you want to include all clients for whom a bill was generated or if you want to select specific clients to include in the statement.
If you select Individually Selected Clients, you need to select the client number in the Client Number box and click Add. Continue this procedure until you have selected all the clients you want to include in the statement. Clients you select will be listed in the Selected Clients box.
If you need to remove a client from the Selected Clients box, highlight the client and click Delete.Date on Statement: The date for the statement. Change as necessary.
Cut Off Date: The date on or before the billed matters are to be included on the statement.
Print Letterhead on Stmt: Check to include your letterhead on the statement.
Include Credit Client Balances: Check to include matters for clients with a credit balance. NOTE: If you use the Individually Selected Clients option AND this option, the program generates statements for all clients you selected AND all clients with a credit balance.
Include Client Zero Balances: Check to include clients with matters with a zero balance.
Include Matter Zero Balances: Check to include matters with a zero balance.
Destination: Select the output format you want for the cover page.
Under Destination, select:
Preview if you want to view the statement on the screen.
Print if you want to print the statement from your printer.
File if you want to store the statement in a file.
Email if you want to email the statement.
Click Preview, Print, File, or Email (depending on what you selected for Destination) to output the statement.