Select G/L > Post Journal Entries. The Post General Ledger Journal Entries window appears.
Do one of the following:
-
To add a journal entry, click Add.
-
To edit a journal entry, highlight the entry and click Edit.
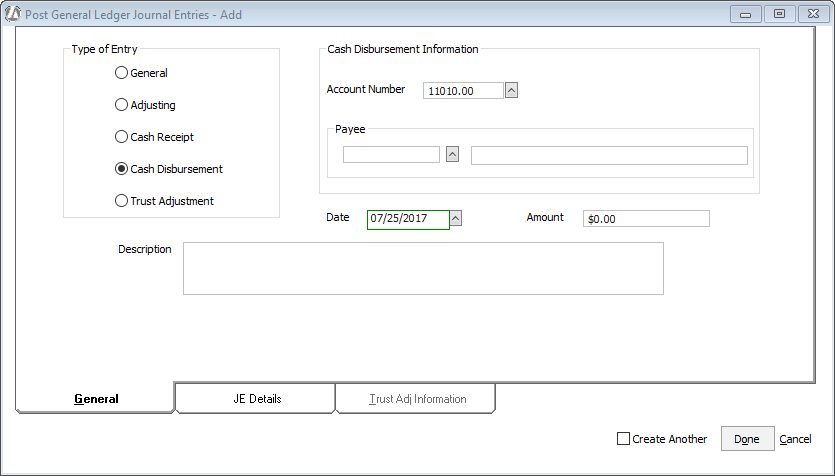
The Post General Ledger Journal Entries – Add or Modify window appears. On the General tab enter the information for the journal entry.

Use the following field definitions to make changes to the window:
-
Type of Entry: Select the type of journal entry. Journal entries are defined as follows:
General (G) - Used for beginning balances when you are importing numbers into Abacus Accounting. Voids are also entered as general entries.
Adjusting (A) – When you make an accounting mistake, you cannot delete it from the general ledger – you have to make an adjusting entry. Adjusting entries are ways of indicating that a correction is being made. Adjusting entries also are provided by your accountant at year-end.
Cash Receipt (R) – Used for transactions where money coming into your accounts.
Cash Disbursement (D) – Used for transactions where money is going out of your accounts.
Trust Adjustment (T) – A general journal entry made when you want to add an entry to the matter trust activity ledger without affecting the general ledger. -
Cash Disbursement Information: (only appears when Cash Disbursement is selected for Type of Entry) Provides an option to include the journal entry and account for cash disbursement transactions.
-
Date: The date for the transaction.
-
Amount: The total amount of the transaction.
-
Description: The description of the journal entry.
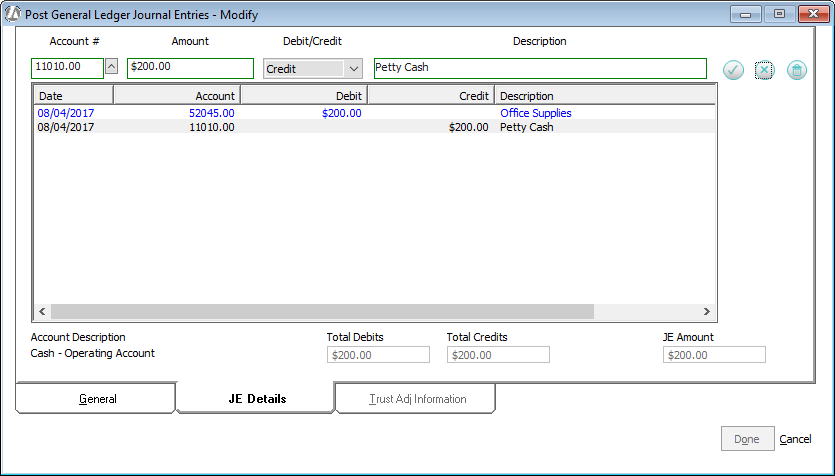
On the JE Details tab, enter/edit the general ledger journal entries.
-
To add a journal entry: Select the account, enter the amount, select whether the entry is a debit or credit (see Quick Review of Debits vs. Credits for help understanding the difference between debits and credits), enter a description, and then click the Add button (
 ). The entry will appear as a line item in the table.
 -
To edit an journal entry: Highlight an entry and the boxes above the table are populated with the entry details. Make your changes in the boxes and click the Save button (
 ). To cancel an edit, click the Cancel button (
 ).
). -
To delete an journal entry: Highlight an entry and the boxes above the table are populated with the entry details. Click the Delete button (
 ). Click Yes when asked if you are sure you want to delete the entry.

Click Done to save the entry.