Recurring Payments
NOTE: This topic covers Recurring Payments for APX 2.0. For information about Recurring Payments for APX 1.0, see this demo.
APX can automatically process a payment against a credit card/ACH account on a predetermined, repeating schedule.
Click here for a video demo of this function.
Viewing Recurring Payment Schedules
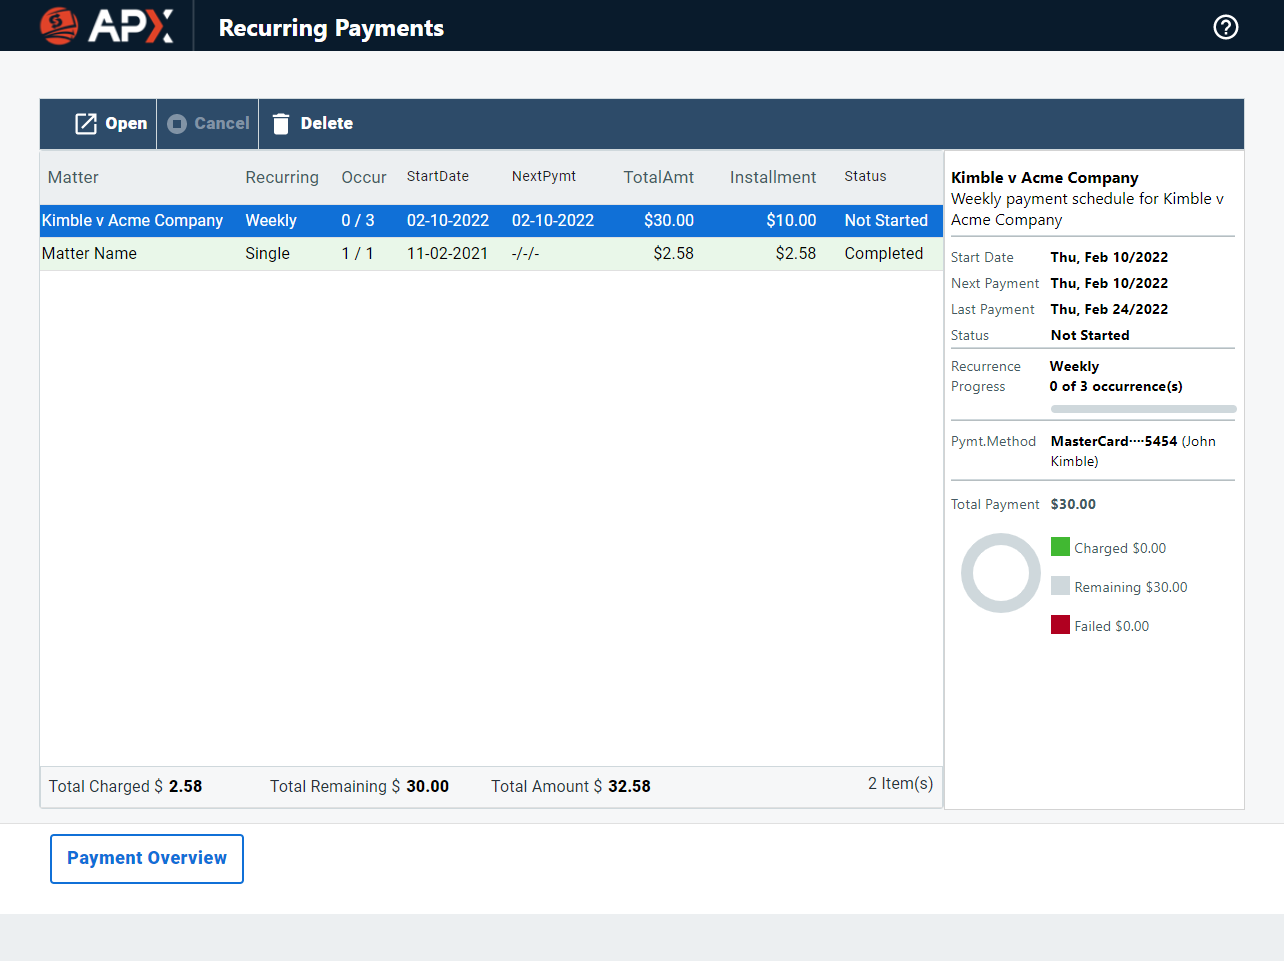
Select Billing > Recurring Payments > View Recurring Payments.
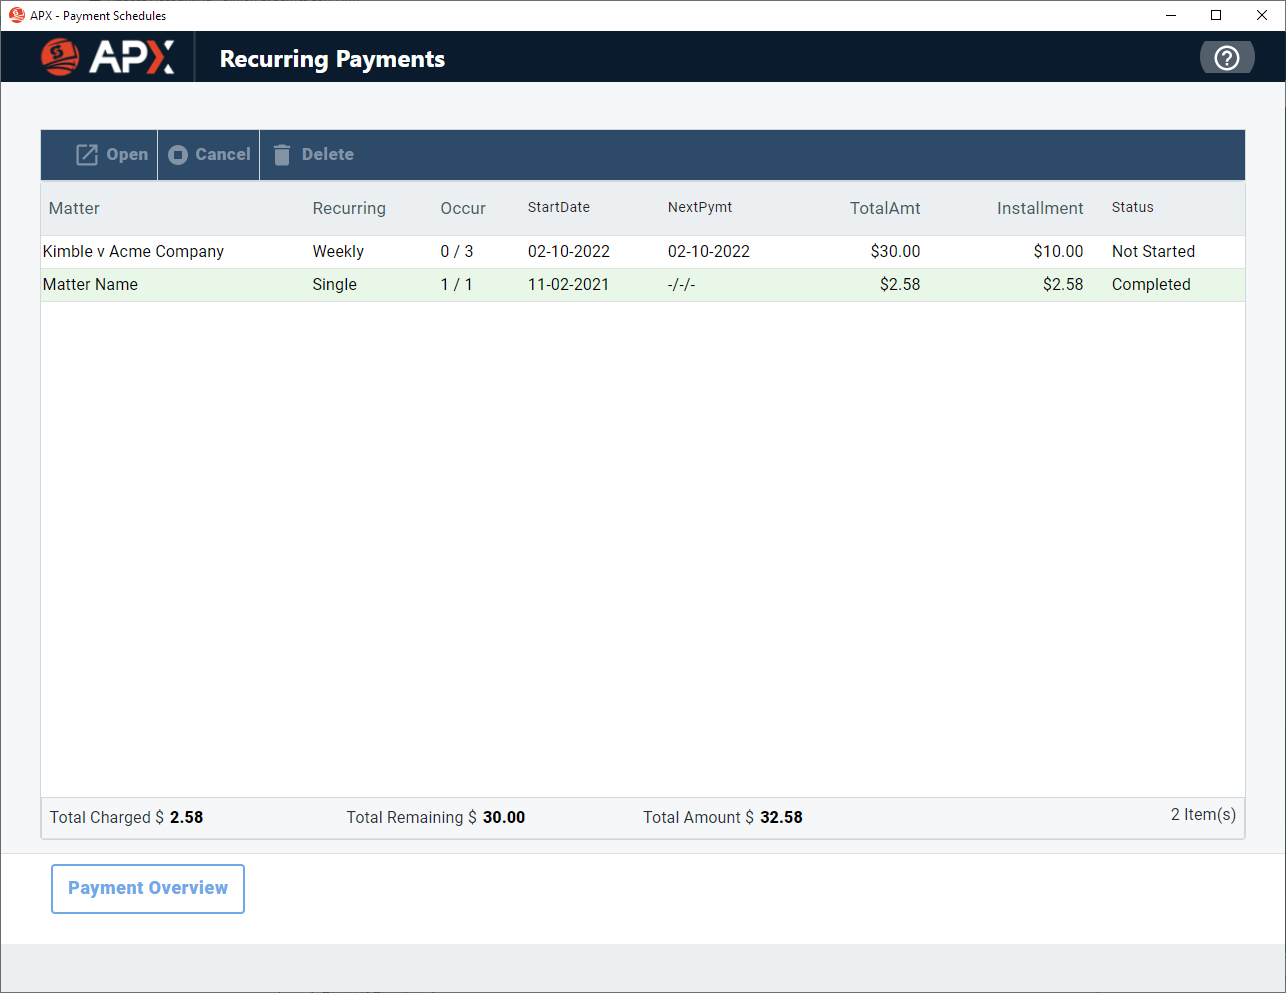
The Recurring Payments window appears listing all recurring payment schedules.
Adding a Recurring Payment Schedule
-
Select Billing > Recurring Payments > Create Recurring Payment.
-
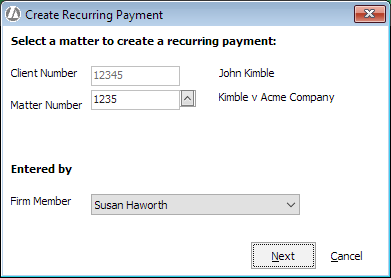
The Create Recurring Payment window appears. Select the matter and click Next.
-
The New Recurring Payment Schedule window appears.
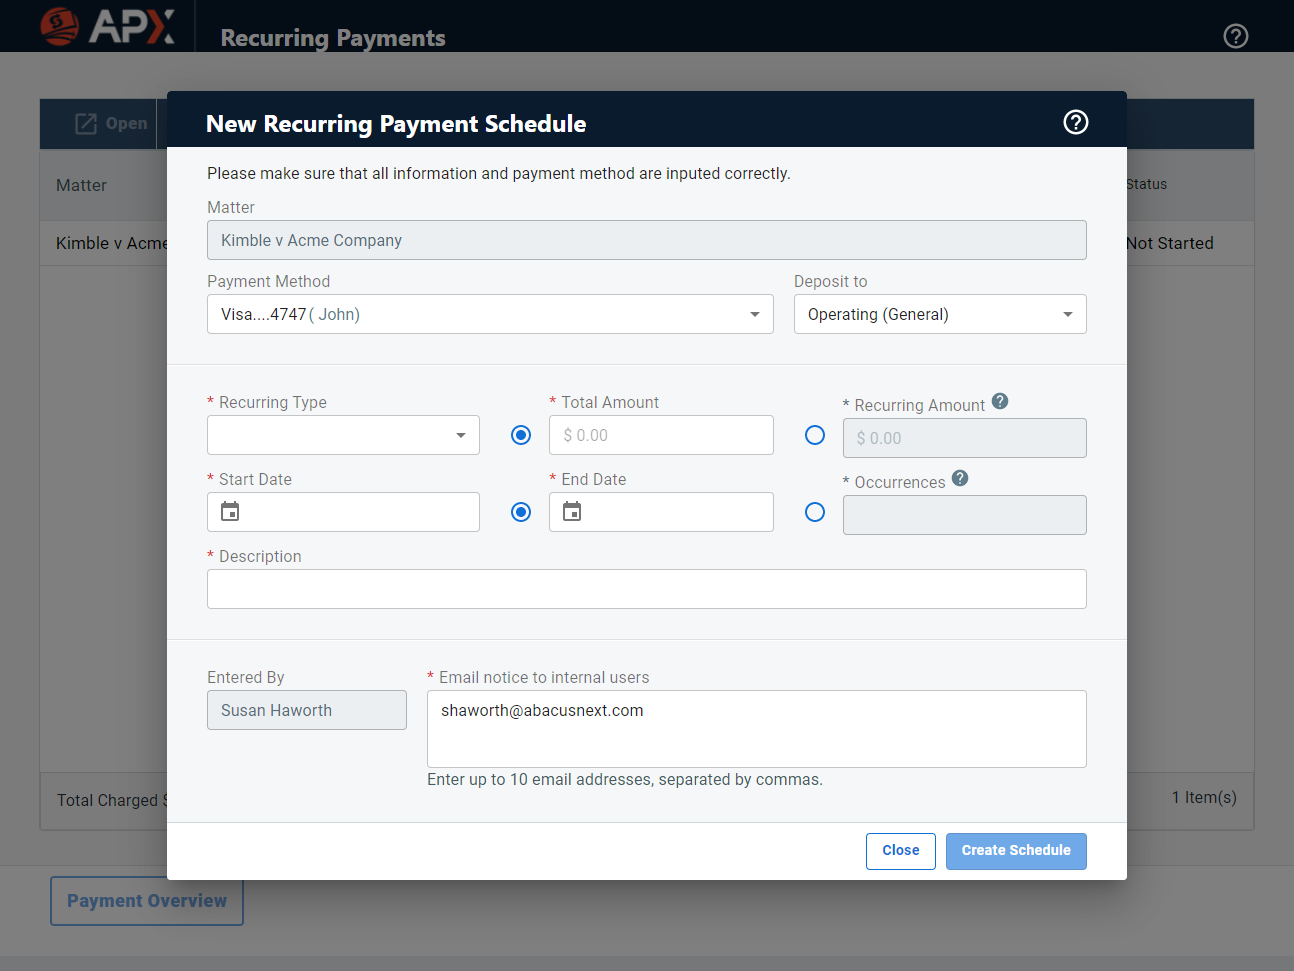
Complete the window as follows:-
Payment Method: Select the payment method for the schedule.
-
Deposit to: Select whether payments should be deposited to the operating account or trust account.
-
Recurring Type: Select the frequency of the payments.
-
Single: Only one payment is processed on the start date.
-
Weekly: One payment is processed each week. Payments after the first payment are processed on the same day as the start date. For example, if the start day is a Monday, then subsequent payments are processed weekly on Mondays.
-
Monthly: One payment is processed each month. Payments after the first payment are processed on the same date as the start date. For example, if the start date is the fourth day of the month, then subsequent payments are processed on the fourth day of the month (Jan. 4, Feb. 4, Mar. 4, and so on).
-
Bi-Weekly: One payment is processed every two weeks. Payments after the first payment are processed two weeks after the previous payment.
-
Quarterly: One payment is processed each quarter. Payments after the first payment are processed on the same date as the start date. For example, if the start date is the first day of the quarter, then subsequent payments are processed the first day of the next quarter (Jan. 1, Apr. 1, Jul. 1, and so on).
-
-
Total Amount OR Recurring Amount: Enter EITHER the total amount to be paid OR the amount to be paid per period. Note that if total amount is entered, the system calculates each payment for you.
-
Start Date: Select the date the first payment will be made.
-
End Date OR Occurrences: Enter EITHER the end date for the recurring period of time OR the number of occurrences you want to happen.
-
Description: Enter the description for the recurring payment schedule.
-
Email Notice to Internal Users: Enter the email addresses to send a notification when recurring payments are processed. You can enter up to 10 email addresses. Separate them with a comma.
-
-
Click Create Schedule to save your changes.
Editing Recurring Payment Schedules
When editing recurring payment schedules, only the payment method and email address for notification can be changed. To make other changes, cancel or delete the recurring payment schedule and create a new one.
-
Select Billing > Recurring Payments > View Recurring Payments.
-
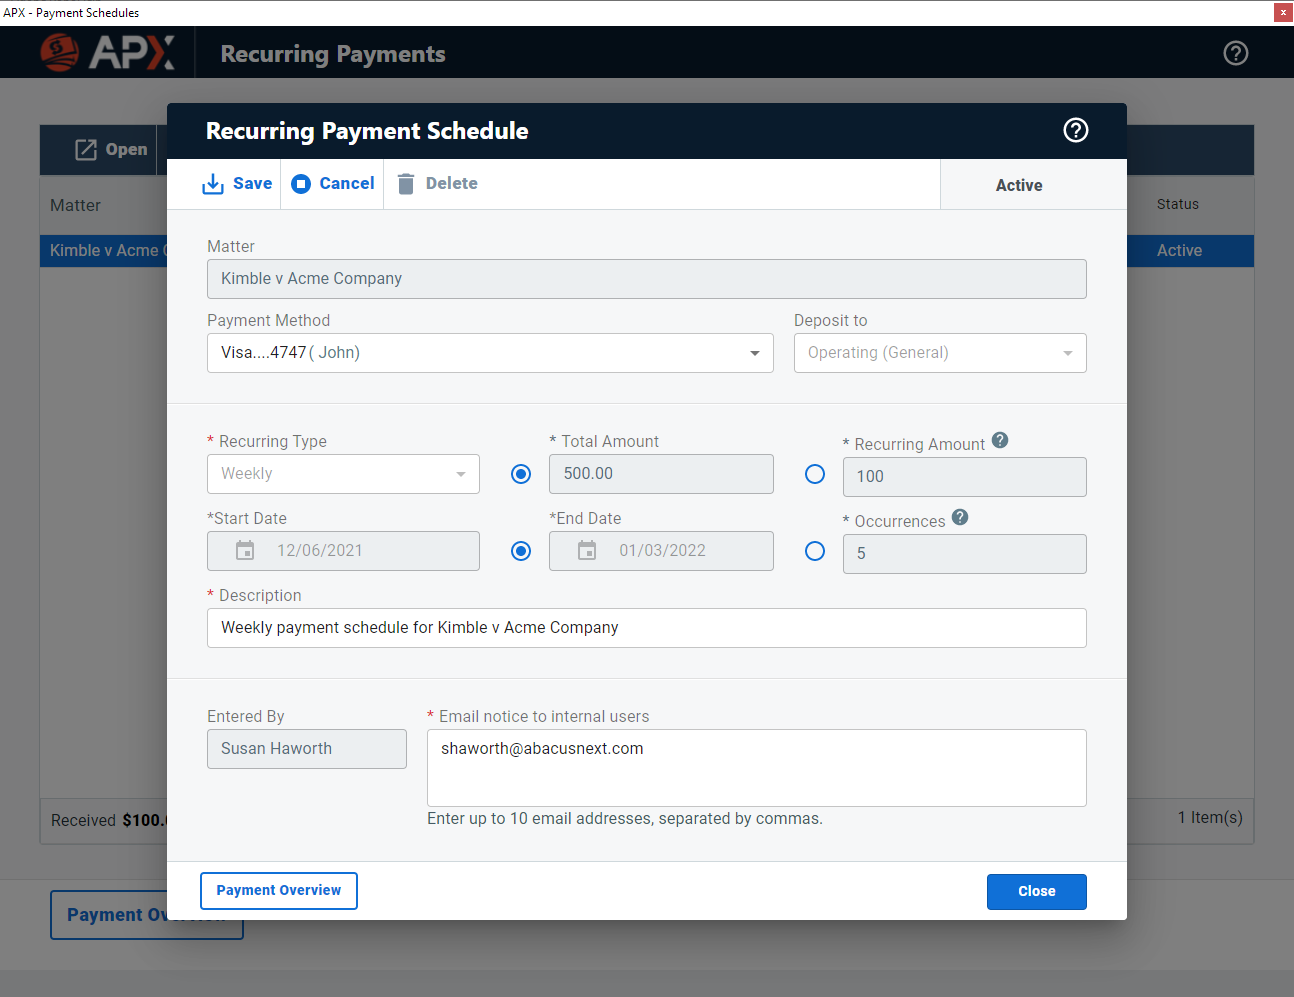
The Recurring Payments window appears. Highlight the recurring payment schedule and click Open.
-
The Recurring Payment Schedule window appears. Only two fields can be edited for an existing recurring payment schedule:
-
Payment Method: Change the credit card or ACH account associated with the selected client to be used to make the payments.
-
Email Notice to Internal Users: Change the email addresses to send a notification when recurring payments are processed. You can enter up to 10 email addresses. Separate them with a comma.
-
-
Click Save to save any changes made.
Canceling or Deleting Recurring Payment Schedules
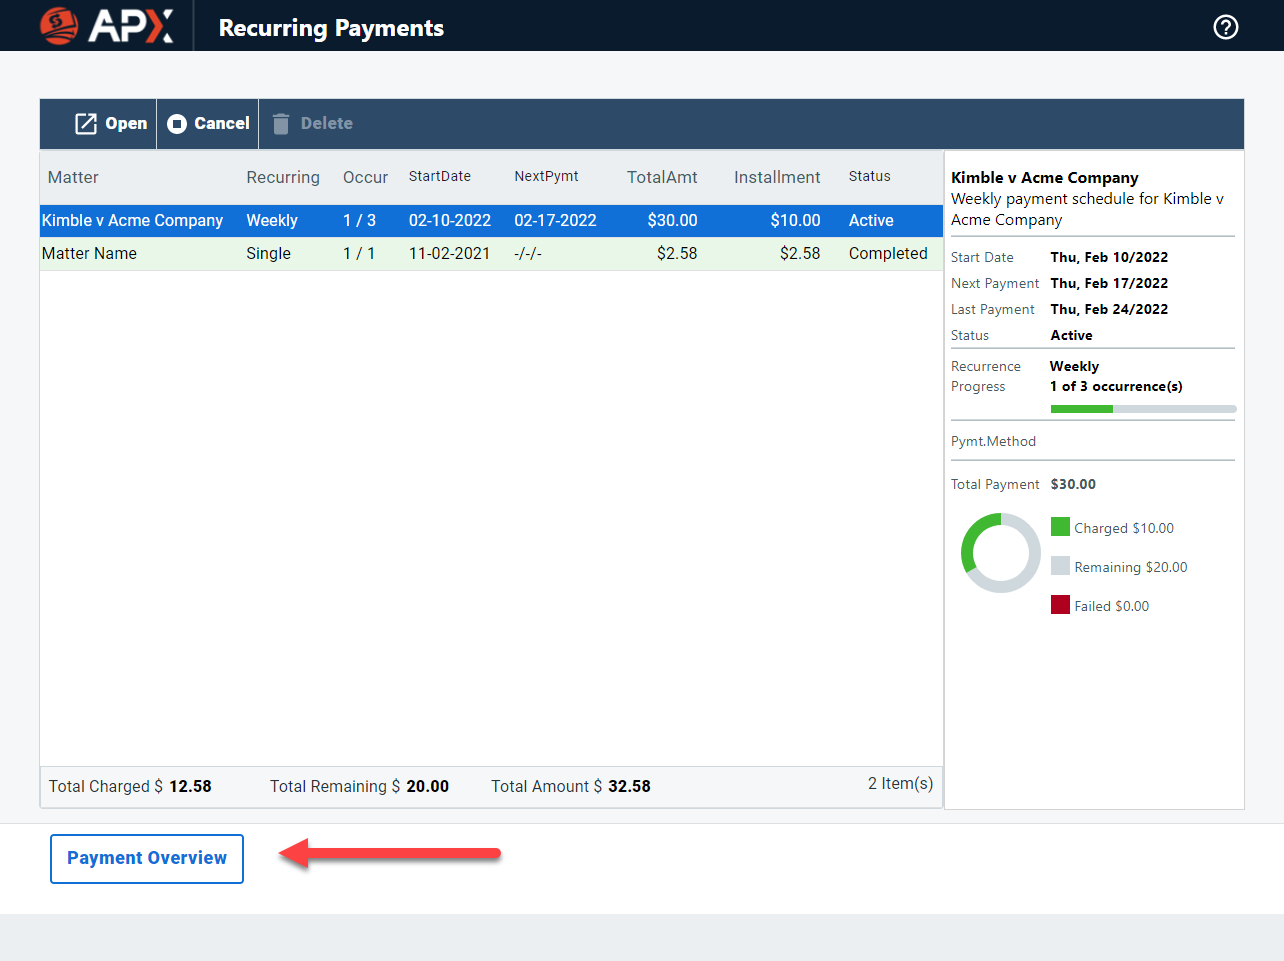
Recurring payment schedules can only be deleted before their start date (Status = Not Started). Once payments have started (Status = Active), they can only be canceled.
Select Billing > Recurring Payments > View Recurring Payments. The Recurring Payments window appears.
Highlight a recurring payment schedule and click Delete if no payments have been made.
Highlight a recurring payment schedule and click Cancel if payments have been made.

Viewing Recurring Payment Schedule Detail
-
Select Billing > Recurring Payments > View Recurring Payments.
-
The Recurring Payments window appears. Highlight the recurring payment schedule and click Payment Overview.
-
The Payment Overview window appears. It lists the amount and status of payments in the schedule.

-
Click Close to close the window.
Posting Recurring Payments
Based on the recurring payment schedule set, when a recurring payment is due, the payment is automatically entered into Abacus Accounting and can be seen listed in the Enter Client Payments window (Billing > Payments Received). Note that recurring payments cannot be edited or deleted.
Recurring payments are paid on account. They are applied to the outstanding invoices from the oldest to the most recent one in the payment order selected in Company Preferences. If there is no invoice pending for payment, then the recurring payment is adjusted as retainer paid and is allocated to the responsible attorney.
Although the payments are recorded automatically, they must be posted manually. Highlight a payment and click Post to post it.