If you selected to share individual records manually when configuring the Client Portal, you need to perform this procedure for every record you want to share.
If you selected to share records automatically by code when configuring the Client Portal, new records will be automatically shared, but you can use this procedure to override those settings or to share existing records.
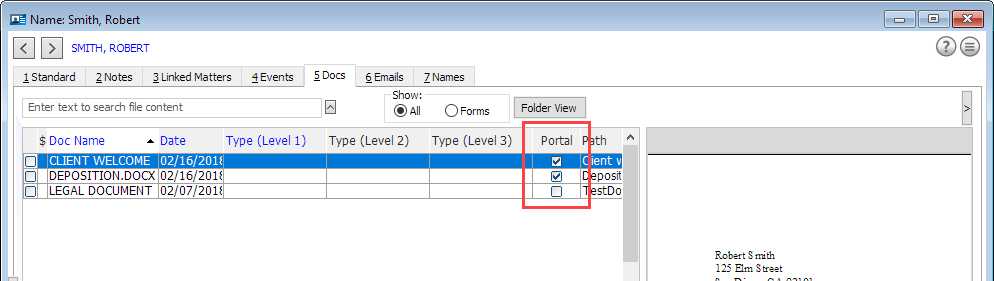
Understanding Record Sharing Status
To understand if a record is shared or not shared in the Client Portal, find the record on the relevant Name window tab (Notes, Linked Matters, Events, or Docs) and look at the Portal check box. (You might need to scroll to the right to see it.) When checked, the record is shared in the Client Portal; when not checked, the record is NOT shared in the Client Portal.
IMPORTANT: The records are shared in the Client Portal with the people you granted Client Portal access to through the name. So, for example, assume you granted Client Portal access to Robert Smith and Amanda Smith from the Robert Smith name. Then, assume you shared the CLIENT WELCOME and DEPOSITION documents from the Robert Smith name. Although this was done from the Robert Smith name, BOTH Robert and Amanda Smith can now access these documents from the Client Portal. Records are shared with the people who were granted Client Portal access through the name - not with the name.
Changing Record Sharing
Tag the records or highlight the records you want to share or unshare in the Client Portal.
Click Portal.
The Portal Sharing window appears.
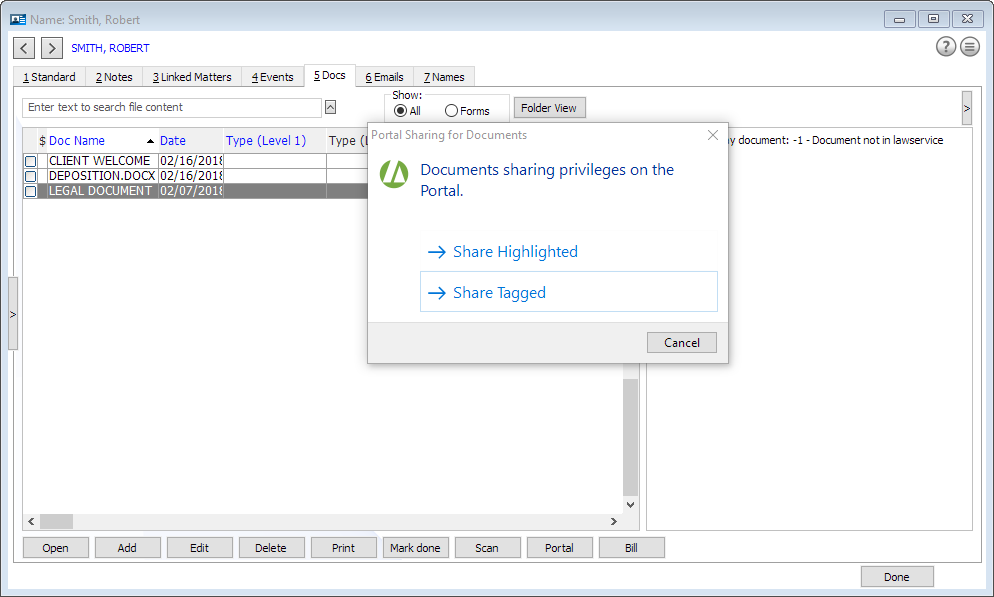
Do one of the following:
If you want to share/unshare the highlighted records, click Share/Unshare Highlighted.
If you want to share/unshare the tagged records, click Share/Unshare Tagged.