-
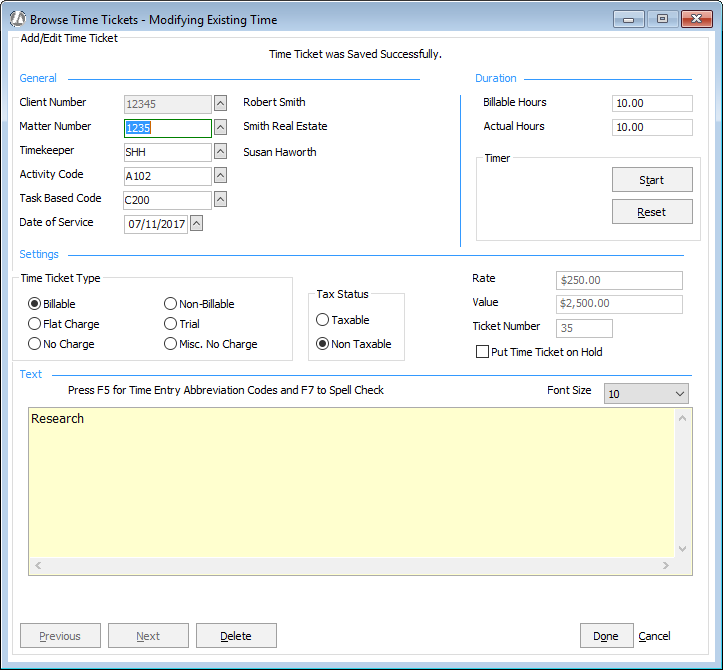
Time Ticket Type: The billing type for this time ticket where:
Billable – indicates that time on the time ticket is billable.
Flat Charge – only used on hourly matters for which a service is performed based on a "flat charge," not the hourly rate.
No Charge – indicates that time on the time ticket is not to be charged. (Time tickets with this code are printed on bills.)
Non-Billable – indicates that time on the time ticket is not billable. (Time tickets with this code are not printed on bills but are printed on the prebill. This allows you to track administrative time.)
Trial – indicates that the time on this ticket is to be billed at the billable hourly rate; however, it is to be shown on the bill as "Trial," allowing you to track hours for trial work.
Misc. No Charge – indicates that the time on this ticket is not to be charged.
NOTE: The Trial and Misc. No Charge fields will NOT appear on the window if you have selected the options under Select time Ticket Types that are non-applicable for Workstation Options.
-
Tax Status: Indicates if the time is taxable or not. NOTE: The Tax Status section will NOT appear on the window if Hide Tax Status on Time Ticket Screen is selected for Workstation Options.
-
Rate: The hourly rate for the selected timekeeper. Not editable.
-
Value: The rate for the time ticket calculated as Billable Hours x Rate. Not editable.
-
Ticket Number: The time ticket number. This is automatically assigned when the time ticket is saved. Not editable.
-
Put Time Ticket on Hold: When selected, the time ticket is on hold. Time tickets on hold will appear on the prebill, but not the actual bill. They will also be broken out in the Matter Summary and Work in Process reports.