Setting Up Exchange/Office 365 Sync
Click here for more information about Exchange/Office 365 Sync.
NOTE: Only users that have been granted permission to change their Exchange/Office 365 Sync settings by the Administrator can perform this procedure.
-
Select File > Setup > User Preferences.
-
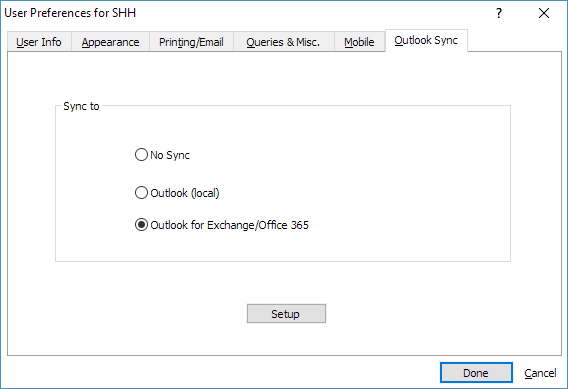
The User Preferences window appears. Select the Outlook Sync tab. Select Outlook for Exchange/Office 365 and click Setup.

-
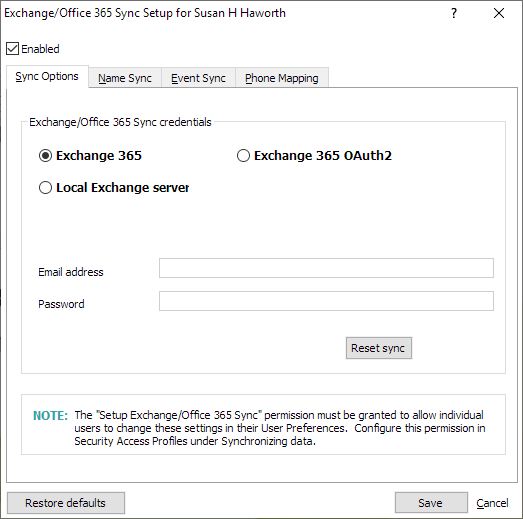
The Exchange/Office 365 Sync Setup window appears with the Sync Options tab selected. Check Enabled.
-
Do one of the following:
-
If using an Exchange 365 server and you want to enter your credentials manually, select Exchange 365 and enter the credentials.

-
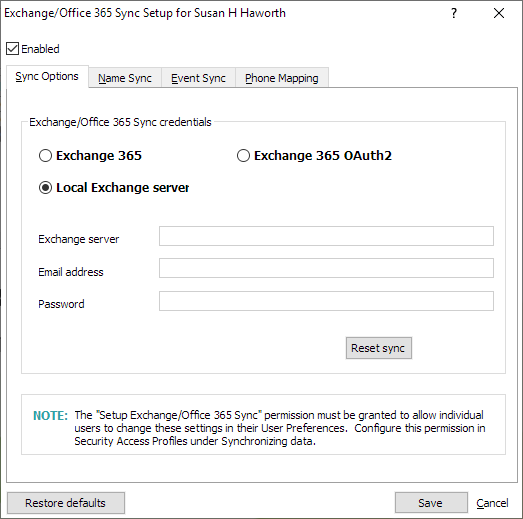
If using a local Exchange server, select Local Exchange server. Enter the Exchange server name and then enter the credentials.

-
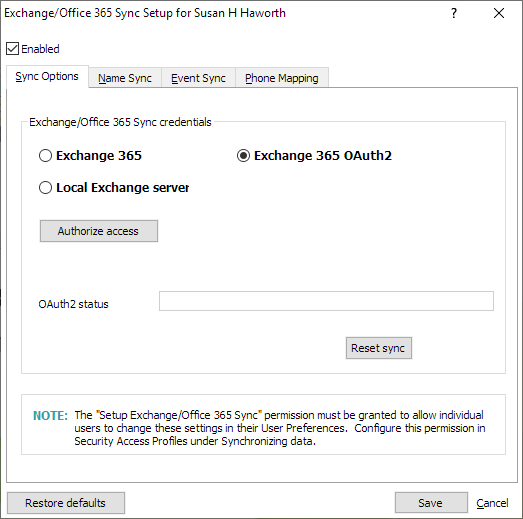
If using an Exchange 365 server and you want to give access to Microsoft to your information so that your credentials can be entered automatically, select Exchange 365 OAuth2 and select Authorize access and follow the on-screen prompts.

-
-
Complete the settings on the other tabs on the window.
-
The Name Sync tab controls the synchronization of names and name notes. If you do NOT want new users to sync names and name notes by default, check Do not synchronize names or contacts. Otherwise, complete the settings on the tab.
-
The Event Sync tab controls the synchronization of events. If you do NOT want new users to sync events by default, check Do not synchronize events or calendars. Otherwise, complete the settings on the tab.
-
The Phone Mapping tab maps Outlook phone number fields to AbacusLaw phone number fields. Complete the settings on the tab.
-
-
Click Done to save your changes.