Sending a Message
You can send a message to anyone on the MessageSlips network.
-
Right-click the MessageSlips icon. A menu appears listing Abacus users. Select the person to whom you want to send a message (the recipient).Or, click New Message for a message with no user selected.
-
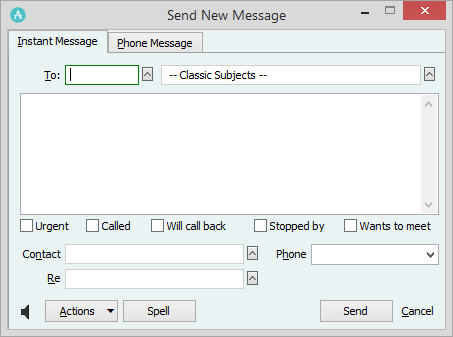
The Send New Message window appears, initialized for the selected user. Select the tab that best represents the message. While you can use either tab for any type of message, the Instant Message tab is best suited for a simple message that is not related to a phone call or Abacus name or matter (like "Come see me when you're free"). When taking a phone message, you usually get the caller's name and phone number before taking the text, so the Phone Message tab is better.
-
The settings on both tabs are the same - they are just arranged differently to accommodate the message type. Use the following to help you complete the settings on the tab you selected for your message:
-
To: The recipient of the message. Enter one or more User IDs separated by commas, or a group name, or use "*" to send to all users. To set by mouse, click the lookup button. The Users Browse window appears listing all the users and groups on your network. Check the people or groups to whom you want to send the message and click Done.
-
Classic Subjects: Pre-set messages you create for quick entry of common text. Type the first few characters and your message is auto-filled with a classic subject and has any assigned sound automatically attached. To set by mouse, click the lookup button. The Classic Subjects and Matching Sounds window appears listing preset classic subjects. Select a classic subject for the message and click Done.
-
Note Box: Contains the message text. After you enter your text, click the Spell button to check your spelling.
-
Check boxes: One-check messages for quickest entry, or add extra definition to the message. Urgent is a fixed feature to flag important messages, but the other checkboxes (Called, Will call back, etc.) can be changed in system options.
-
Contact: The client or other person the message is from or about. This is usually an Abacus name (type last names first, just like calendar events), but can be any name you enter. To select from a list, press F9 or click the lookup button. The Names Browse window appears listing the names in Abacus. Highlight a name and click Done. Notice that when you select a name, the telephone number is automatically displayed in the Phone box (if the name record had this field complete). If the name has more than one telephone number, the others are listed in the drop-down list.
-
Re: The related Abacus matter. Enter a matter name or click the lookup button. The Matters Browse window appears listing the matters in Abacus. Highlight one and click Done.
-
Speaker button: Click if you want to assign a custom sound to the message. The Select Sound File window appears. Select the sound you want to associate with the action and click Open.
-
-
Click Send (or press Ctrl+Enter) and the message will be immediately sent to the recipient.